Getting Started
Ready to update your marketing playbook? Learn how to get started with our tools and maximise the value from your visitors!
Installation of our javascript tag
Our javascript tag is the driver behind our campaigns and allows us top optimise your website for you. To keep it as simple as possible it's just a single line of code that needs to be added to every page of your site, unconditionally. All configuration is done on our side. Isn't that sweet?
The CartBooster tag is always the same and does not need any custom integration or parameters to be set by you. That is because we take care of the complete configuration on our side, so you can continue running your business instead. Now, without further ado, here's your tag:
<script type="text/javascript" async src="//s.cartbooster.io/preload"></script>
We recommend using Google Tag Manager for the easiest setup of our tag. Follow these steps to install our tag in less than a few minutes:
- Log in to your Google Tag Manager account.
- Go to the 'Tags' section and hit the ‘New’ button.
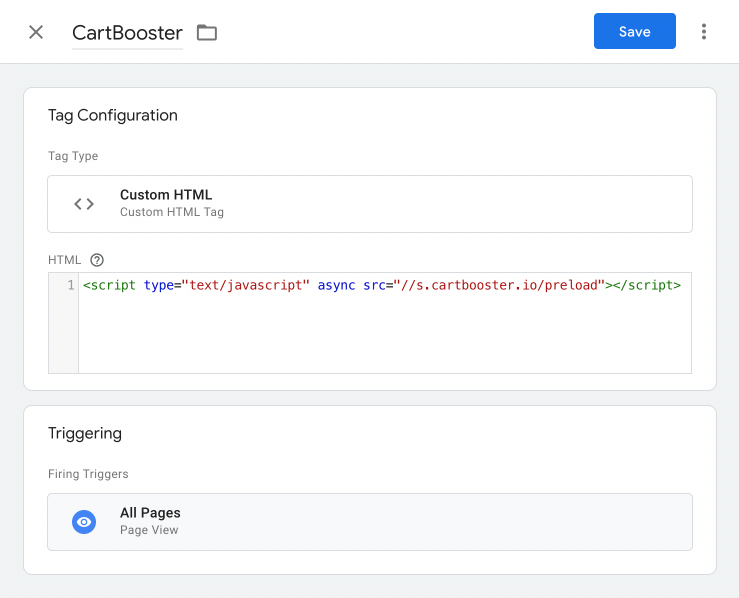
- In the tag setup area, assign a name to your tag.
- Click on the Tag Configuration box, select ‘Custom HTML’.
- Copy your tag and paste it into the HTML box provided in the Tag Configuration section.
- Move to the Triggering section, and select ‘All Pages’.
- Save your new tag.
- Finish by submitting and publishing the changes to the GTM version that is live on your website
After you're done, your tag setup in Google Tag Manager should look something like this:

Our tag can be installed on your Shopify store in 2 simple steps. The first step is to add the tag in your theme. This will install it on most pages except the checkout pages. In the second step we will add it to the order confirmation page.
Step 1: Adding our tag to your theme
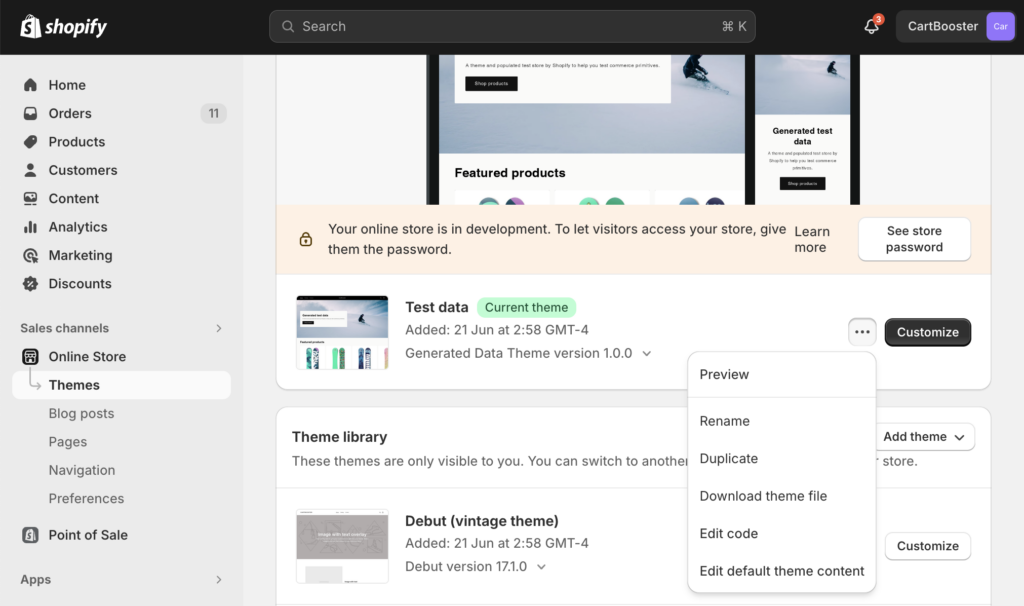
- Login to your Shopify store admin and navigate to ‘Online Store’ in the main navigation on the left side of the screen. The ‘Themes’ page should open automatically.
- For your current theme, open the ‘Actions’ menu (with the 3 dots) and click the option ‘Edit code’. This should open a file navigator showing all your template files.

- Find and open the ‘theme.liquid’ file in the ‘Layout’ section. The file should open and you should see the code it contains. This is where we are going to insert our tag.
- Paste our tag right after the <head> tag and click the ‘Save’ button in the top right corner.
Step 2: Adding our tag to your order confirmation page
- In your Shopify store admin, navigate to the ‘Settings’ page in the bottom left corner and click on ‘Checkout’.
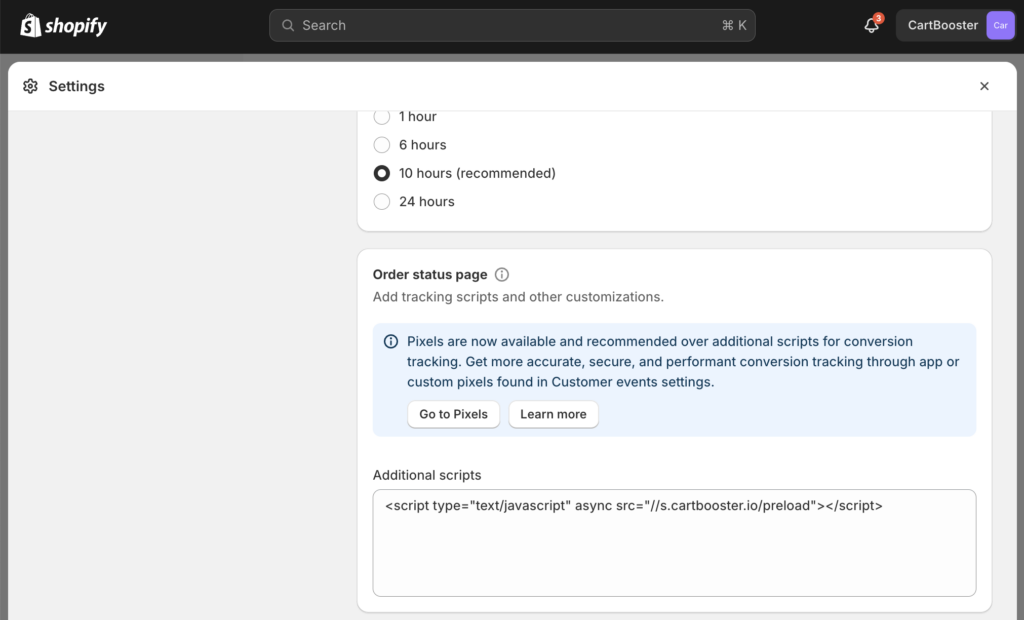
- Scroll down on the Checkout page until you see the ‘Order status page’ section. At the bottom of that section there is a field ‘Additional scripts’. Paste our tag in that field and save the settings.

If you are not using Google Tag Manager and do not want to start using it, you can of course also install our tag manually. The way to do that will depend on the CMS that you are using for your website. However here are some important guidelines to keep in mind:
- Make sure the tag is installed on every page, including checkout pages and the order confirmation page
- Make sure the tag is installed either in the <head> section of the page or else high up in the <body> section.

